
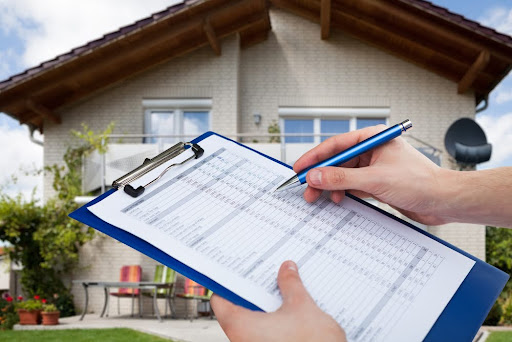
A final walkthrough checklist is a comprehensive list used by homebuyers to inspect a property before closing the sale. This checklist serves as a guide to review various aspects of the home, ensuring that all agreed-upon repairs have been completed, included items are present, and the house is in the expected condition.
Are you about to close on your new home?
Use a final walkthrough checklist to ensure you don’t miss anything important when doing a final inspection of the home you’re about to buy. This is one of the final steps of buying a home and your last chance to make sure you’re happy with everything before the home becomes yours. So you must take this job seriously.
Remember: the final walkthrough normally happens a few days before closing (sometimes even on the closing date), and you will also usually have your real estate agent with you. Our final walkthrough checklist works on mobile, so you can open it up on your phone and mark each item as complete when you’ve checked it.
Homebuyer’s Final Walkthrough Checklist
| No. | Name | Description | Check Complete? | Issue Found? |
| 1 | Repairs and renovations | Ensure any agreed-upon repairs and renovations have been completed to a decent standard. Take copies of warranties and receipts for any work done. | ||
| 2 | Included items | Check that all items that were supposed to be included by the seller are present (e.g. manuals, warranty information, specific fixtures). | ||
| 3 | Windows and doors | Check all windows and doors can open and close smoothly and that all locks function and have a key where applicable. | ||
| 4 | Plumbing | Test that all faucets work without leaking, check the shower for pressure and heat, and check all toilets flush correctly. | ||
| 5 | Included appliances | Check that all included appliances, including kitchen appliances, work correctly. | ||
| 6 | Heating and air conditioning | Ensure all included heating and air conditioning systems are working correctly. | ||
| 7 | Electrical systems | Test all light switches, power outlets, and any other electrical components. | ||
| 8 | Ceiling, walls, and floors | Inspect the ceiling, walls, and floors for any signs of damage not identified in the original inspection. | ||
| 9 | Exterior | Visually inspect the condition of the roof, siding, and gutters. Look for signs of damage or changes since the original inspection. | ||
| 10 | Left-behind items | Check that the seller has removed all their personal belongings except items agreed to be left behind. | ||
| 11 | Pest infestation | Check for any new signs of pest infestation, such as smell, droppings, or signs of nesting. | ||
| 12 | Mold | Check for any new signs of mold, such as a musty smell, visible mold spores, or dark spots on surfaces. | ||
| 13 | Garden and outdoor areas | Review the condition of all outdoor spaces included with the property, including the garden, deck, patio, and any outbuildings. | ||
| 14 | Final meter readings | Note the readings of the water, gas, and electricity meters. Photograph the meter and note the date. | ||
| 15 | Cleanliness | Check the property is in a reasonably clean condition. | ||
| 16 | Review HOA (if applicable) | If the property is part of a Homeowner’s Association, make sure to review any rules you will be bound by. |
How to Do a Final Walkthrough before Closing
The final walkthrough is your last chance to make sure everything is as you want it to be before closing, so it’s important to take it seriously. Here’s a step-by-step guide on how to do a final walkthrough.
- Agree on a date for the final walkthrough with both the seller and your real estate agent. Your real estate agent will normally be very experienced and able to help answer any questions you may have. Your real estate agent can also mediate any potential areas of disagreement.
- Before the final walkthrough, ensure you have all your documentation ready. For example, you should have:
- Your real estate contract, which should contain an inventory explaining what items/appliances will be left behind.
- If it was agreed that any repairs or renovations would be made, a copy of these agreements.
- To complete your final walkthrough:
- Methodically work through each item on our final review checklist.
- Take your time, and don’t feel rushed or pressured by the seller.
- If anything feels wrong, note it, ask your real estate agent and seller for further information, and take a photo or video.
- Make sure you stay safe during the inspection by getting professional help if needed. For example, you should only access the roof area to inspect the gutters if it is safe for you to do so. If you are unsure or think an element of the inspection might be dangerous, hire a qualified professional.
- You also may need to hire a professional if you have suspicions you cannot confirm. For example, the presence of mold or pests can be verified by an appropriate expert.
If you have worked through our entire checklist and found no issues — fantastic! You can get ready to close on your new home and start thinking about moving. You are one step closer to the dream of homeownership.
Looking for a Friendly and Experienced Loan Officer?
An experienced Loan Officer can help you buy your dream home. They’ll help you understand how much you can borrow, how much you’ll need to repay each month, and how much (if anything) you’ll need to pay in closing costs.
At DSLD Mortgage, we’ll help you find a Loan Officer with experience in the specific location you’re looking to buy.
Final Walkthrough: What to Do If You Find an Issue
If you do find issues, then be prepared to dig a little deeper to confirm the extent of the problem. Your first step should be to document the issue by taking photos and videos or making a note of the issue.
Your next step should be to raise the issue with the seller and/or your real estate agent. It may be possible to resolve the issue here by agreeing on an appropriate fix. Remember — unless the issue you’ve found is severe, you’ll still want to buy the property, and the seller will still want to sell. Try to reach a compromise that works for both parties, but don’t allow yourself to be pressured into something you’re not happy with.
As mentioned above, hiring a professional to review a potential issue might sometimes be necessary to verify a problem, establish its extent, and give you a ballpark estimate on how much it will cost to resolve it. This information can be helpful when negotiating with the seller.
If you have found issues, remember to delay your closing date to allow the seller time to fix the issues raised. Once you’ve closed, it will be difficult, if not impossible, to get the seller to resolve any remaining problems.
In some rare cases where the issue is serious and expensive, you may have to be prepared to walk away from the sale. This can be a disappointing outcome, but it might be better to walk away from the sale than to move into a property with a severe problem you cannot afford to fix. In this case, you may also consider taking legal action against the seller.
Getting Ready to Move
You will often find no issues with the property during your final walkthrough. Many issues that come up are minor and can be easily solved. There will always be some things you want to change about the property, and you cannot reasonably expect the seller to do everything! Part of the joy of owning a property is making changes over time so everything is exactly how you want it to be.
Ready to Apply for a Mortgage?
Would you like to start the process of buying your next home? Our expert Loan Officers know about all aspects of the mortgage loan process and are ready to help you feel empowered on your homebuying journey.
Request a free consultation with our team today.
Article Sources
- Investopedia — “Closing: What is it, How it Works, Requirements” Mar 24, 2021.
- Forbes — “HOA Fees: What You Should Know Before You Buy” Nov 26, 2023.
- Investopedia — “7 Conditions You Must Have in Your Real Estate Contract” Jul 27, 2023.
- Forbes — “Here’s How To Back Out Of A Real Estate Deal” Dec 13, 2023.


